How to run a design sprint in Lucidspark
Reading time: about 6 min
At this point, most product teams, designers, engineers, and anyone else involved with product development know what a design sprint is. And many—we’d even venture to say most—have participated in one. So why is the design sprint such a popular problem-solving process?
Here’s the simple answer: Design sprints are effective.
That’s really all there is to it. They provide an easy-to-follow framework for addressing and solving problems in a short period of time. And they work. The key to a successful design sprint is collaboration—taking input from across your team, assessing each idea as a group, and selecting the best path forward.
With the current pandemic, many teams are working from home—this could throw a wrench in the works, right? But it doesn’t have to. Here at Lucid, one of our product managers (and his entire team) have moved their design sprints into Lucidspark and have used it as their online sprint planning tool, which has turned out to be even more engaging than these sprints are in person.
In this post, we’ll break down their process for you!
The 5 stages of a design sprint
Before diving into our product team’s process, let’s cover the basics: What goes into a design sprint? (We’ll give you a brief overview. If you’re completely new to design sprints, we’d recommend starting with this post.)
Design sprints are broken into five stages, each corresponding to a day of the workweek:
1. Understand
Before you tackle a problem, you need to understand its ins and outs. During this stage, your team maps out the problem, lists long-term goals, and identifies particular friction points.
2. Ideate
This stage tackles the big question: What are some possible solutions to the problem? This stage might include looking at competitors for inspiration.
3. Decide
So far your team has been focused on generating ideas, now it’s time to evaluate them. During this stage, your team will choose which solution to move forward with.
4. Prototype
You’ve settled on a solution—now it’s time to build it. Or at least build a prototype. (You’ll need more than a day to actually build and implement it!) This stage includes storyboarding, as well as creating higher-fidelity prototypes.
5. Test
At the end of the day, the best person to test your solution is the customer. The fifth and final stage of a design sprint should involve presenting your prototype to actual customers and recording their feedback.
What does a design sprint look like in Lucidspark?
As we break down the Lucidspark processes our product team uses for their design sprints, keep this in mind: No two design sprints are the same. The stages are consistent across sprints, but the specific procedures and processes that go into each stage will look a little different across teams and companies. Whether you follow these steps exactly or simply use them for some Lucidspark inspiration, we hope you can learn something from our team’s experience!
Stage 1: Understand
Before diving into a sprint in earnest, it’s a good idea to record a general overview. Our team adds this to the Note Panel in Lucidspark. They include details about the sprint and a rough overview and timeline. This way, if anyone joins in late, they can quickly get themselves up to speed.
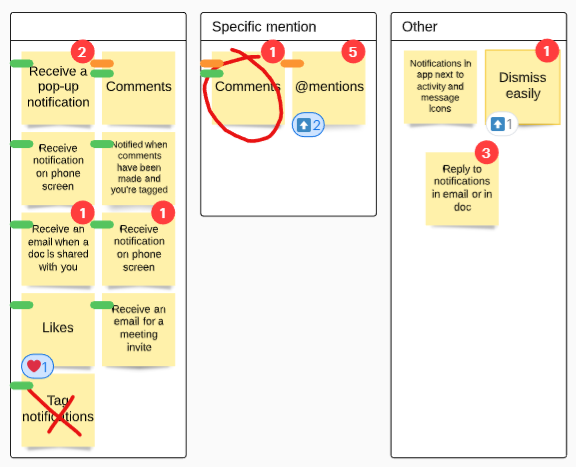
Next come the first real tasks of the sprint: brainstorming long-term goals and sprint questions. To do this, our team adds containers to the board. In one labeled “What are our long-term goals?” team members use sticky notes to record their ideas. In the other container, team members record questions they think will help inform the direction of the design sprint.

The team then maps out the current user experience using—you guessed it—sticky notes. These notes are connected with arrows to represent the user journey. With a visual representation laid out on your Lucidspark board, it is easy to identify and label points of friction.

Stage 2: Ideate
To come up with the best possible solution, it’s crucial that the problem is framed correctly. To define “the problem,” our team uses a “How might we?” exercise. The process is simple: Each team member writes one “how might we” question on a sticky note on the Lucidspark board. (For example: “How might we make templates more intuitive?”)
The facilitator then groups similar questions together, and participants vote on their favorites (using Lucidspark’s voting feature!). Once the options have been narrowed down, all that’s left is to select the question that best conveys the problem at hand. The goal of your sprint will be to answer that question.

Not every idea will be 100% original—and that’s ok! To kick-start their own ideas, our team uses a lightning demos exercise. First, they list competitors who face similar challenges. (These are listed on sticky notes and sorted into a container, of course.) Each team member then selects a competitor and dives in deeper: How do they tackle the problem?
Each team member records their findings in a container labeled with their name. This documentation might include sticky notes describing certain features or even screenshots of the competitor’s product.

Stage 3: Decide
The sticky notes from lightning demos are then grouped together using assisted grouping. Our team grouped by color, then sorted them manually according to theme. Using tags, however, you can also add themes directly to the sticky notes to make sorting even quicker.
Stakeholders then use emoji reactions and Lucidspark’s voting feature to select their favorite solutions. By the end of the process, it’s clear which solution (or solutions) to move forward with.

Stage 4: Prototype
With a clear sense of which solutions to implement, our team then moves on to storyboarding. First, they create storyboards that show the user story as it currently exists. This functions as a skeleton—it is fleshed out with sticky notes showing where the new features will fit into the user story.


Next, our team creates very basic prototypes in Lucidspark.

Lucidspark isn’t meant to create high-fidelity prototypes. And so as the prototyping process moves forward, you might find you need another tool to finish the job. With Lucidspark’s ability to import into Lucidchart, this is simple! In Lucidchart, you can create interactive prototypes with more detail.
Stage 5: Test
It’s up to you how you test your designs, but it should probably involve actual customers. If you’ve imported your Lucidspark board into Lucidchart, connecting customers with your prototype couldn’t be easier. You can share your document using presentation mode, allow them to click through interactive prototypes, and more—all within Lucidchart!
As we said before, no two design sprints are the same. Yours won’t look exactly like our team’s. That being said, this much remains true, no matter who you are: Lucidspark can help bring your team together for sprints, whether you’re in the office or working from home.

Now it’s your turn! Start running your own design sprint in Lucidspark today.
Get startedAbout Lucidspark
Lucidspark, a cloud-based virtual whiteboard, is a core component of Lucid Software's Visual Collaboration Suite. This cutting-edge digital canvas brings teams together to brainstorm, collaborate, and consolidate collective thinking into actionable next steps—all in real time. Lucid is proud to serve top businesses around the world, including customers such as Google, GE, and NBC Universal, and 99% of the Fortune 500. Lucid partners with industry leaders, including Google, Atlassian, and Microsoft. Since its founding, Lucid has received numerous awards for its products, business, and workplace culture. For more information, visit lucidspark.com.
